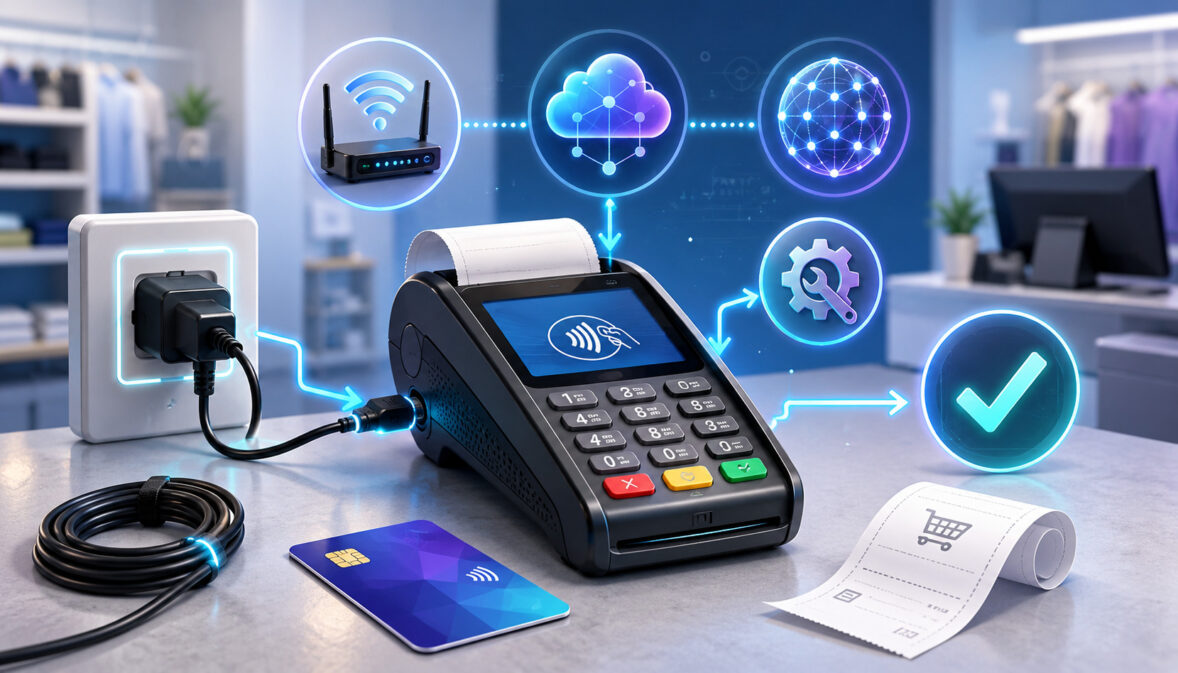
Setting up a credit card terminal involves more than plugging in the device and turning it on. A terminal needs the correct merchant configuration, a reliable network connection, authorized processor settings, supported payment methods, receipt preferences, security controls, and settlement configuration before it can reliably accept in-person payments.
At a high level, to set up a credit card terminal, you need to verify that the device is compatible with your merchant account and payment processor, inspect and connect the hardware, establish an Ethernet, Wi-Fi, or cellular connection, activate and initialize the terminal, confirm merchant information, configure payment methods, and run test transactions.
You should also confirm that transactions settle correctly before putting the terminal into regular service. Exact procedures vary. Credit card terminal setup can differ based on the terminal model, payment processor, acquiring bank, merchant account, POS software, business type, payment methods, and network connection.
For that reason, this guide focuses on the steps and checks that apply broadly without inventing device-specific menu names, passwords, administrator codes, or activation procedures.
Whenever a terminal requires a specific credential or configuration command, use only the documentation supplied by the terminal provider, processor, POS vendor, or other authorized source.
What Is a Credit Card Terminal?
A credit card terminal is an electronic device used to capture payment information and send a transaction for authorization. Depending on the equipment and merchant configuration, it may accept credit cards, debit cards, digital wallets, EMV chip payments, contactless payments, and sometimes magnetic-stripe transactions.
You may hear several terms used for similar equipment, including payment terminal, credit card machine, card reader, POS terminal, merchant terminal, chip card terminal, and card payment terminal.
The exact meaning depends on the system. A small reader connected to a phone operates differently from a full countertop terminal integrated with inventory and restaurant software.
Modern terminals commonly support EMV chip cards and NFC payments. EMVCo explains that EMV contactless technology supports contactless chip cards as well as NFC-enabled phones and other mobile devices, allowing customers to tap rather than physically insert a payment card.
Businesses can review EMVCo’s information about EMV contactless payments for additional technical background.
Magnetic-stripe capability may still exist, but a swipe should not automatically be treated as the preferred method when a chip is available. How fallback transactions are handled depends on the card, processor configuration, network rules, terminal certification, and transaction circumstances.
Standalone Terminals
A standalone terminal processes payments independently of the main cash register or POS software. An employee typically enters the transaction amount into the payment terminal, and the customer inserts, taps, or otherwise presents a card.
These terminals can be practical when a business does not need payment transactions automatically tied to inventory, order tickets, or customer records. They are common in smaller retail environments, offices, professional services, and businesses that want a relatively simple merchant terminal setup.
The tradeoff is additional reconciliation. If an employee rings up a $48 sale in one system and manually enters $84 into the terminal, the two records will not match automatically. Staff therefore need procedures for comparing terminal transactions with register, invoice, or accounting records.
A standalone payment processor terminal may still have sophisticated capabilities, including tipping, PIN debit, refunds, reporting, automatic batch settlement, digital receipts, and contactless payment acceptance. The available functions depend on the processor and approved terminal configuration.
Integrated POS Terminals
An integrated terminal communicates with a POS system rather than requiring the cashier to enter the sale amount separately. The POS sends the transaction amount to the payment device, the terminal handles the card interaction, and the result returns to the POS.
This structure can reduce duplicate data entry and make reconciliation easier. It may also connect card payments with inventory, employee reporting, restaurant orders, customer records, taxes, discounts, and other POS functions.
Integrated POS terminal setup is usually more involved because compatibility matters at several levels. The terminal hardware must work with the processor, and the POS software must support the appropriate payment integration.
A device can therefore be technically capable of accepting cards but still be unsuitable for a particular POS environment.
Before buying or moving an integrated terminal, confirm compatibility with the POS provider and payment processor. For businesses evaluating the larger checkout environment, this guide to choosing a POS system provides additional context on POS functionality and integration.
Mobile Readers, Smart Terminals, and Wireless Terminals
Mobile credit card readers are designed for situations where payments happen away from a fixed checkout counter. They may connect to a phone or tablet, communicate through Bluetooth, or operate as independent mobile payment devices.
Smart terminals combine payment processing with a touchscreen operating environment and may support business applications, electronic receipts, customer prompts, or other features. Their setup can resemble both a traditional card machine installation and a software device deployment.
Countertop terminals are usually positioned at a permanent checkout station and may use Ethernet or Wi-Fi. Wireless terminals can be carried around a restaurant, store, event space, service location, or other work area.
A cellular payment terminal may communicate without relying on the merchant’s local Wi-Fi network. This can be useful for mobile businesses, temporary locations, outdoor events, delivery operations, or backup connectivity.
Whatever form factor you use, compatibility should come before convenience. A terminal’s physical design does not tell you whether it is properly certified, provisioned, and supported for your merchant account.
What You Need Before Setting Up a Credit Card Terminal
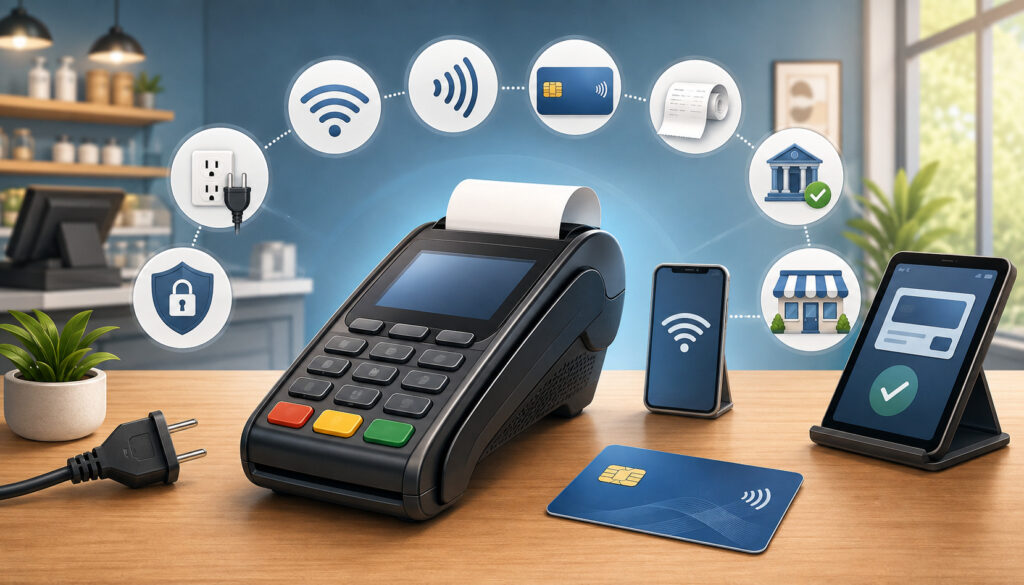
Successful payment terminal installation begins before the device is powered on. Gather the account, equipment, connectivity, and configuration information needed for your particular environment.
The most important requirement is an active payment-processing relationship. A business generally needs an approved merchant account or equivalent processing arrangement before a processor can correctly provision a terminal. Businesses still completing onboarding may find this explanation of merchant account approval requirements useful.
You should normally have:
- An active merchant account or payment-processing relationship
- A terminal approved for your processor and payment environment
- The processor-provided configuration or provisioning
- The correct manufacturer-approved power supply
- Ethernet, secure Wi-Fi, or cellular connectivity
- A Merchant ID where applicable
- A Terminal ID where applicable
- Store or location identifiers when used
- POS integration information for connected systems
- Authorized activation or login information
- Receipt paper for terminals with integrated printers
- Appropriate network cables or docking equipment
- Access to authorized support contacts
- A small legitimate purchase suitable for testing
Do not assume that merchant IDs, terminal IDs, activation credentials, or network settings can be copied from an older terminal. Moving identifiers without processor approval can cause routing, reporting, settlement, or account-assignment problems.
Credit Card Terminal Setup Checklist
| Setup Item | Why It Matters | What to Verify |
| Merchant account | Allows transactions to be processed under the correct business relationship | Account is active and approved for intended payment activity |
| Terminal compatibility | Unsupported devices may not provision or process correctly | Exact model is approved by processor and POS provider |
| Power connection | Incorrect adapters can damage equipment | Approved power adapter, cable, and outlet are available |
| Internet connection | Most modern terminals need connectivity for authorization | Ethernet, Wi-Fi, or cellular connection works reliably |
| Processor activation | Links the device to the processing environment | Processor confirms terminal is registered and activated |
| MID/TID | Helps identify merchant and terminal activity | Assigned identifiers match authorized records |
| EMV/contactless | Supports modern card-present payment methods | Chip and NFC functions are enabled where supported |
| Receipt settings | Affects customer and merchant records | Printer, digital receipt, header, and copy settings are correct |
| Settlement settings | Determines how captured transactions are submitted | Automatic or manual batch process is understood |
| Test transaction | Confirms end-to-end operation | Approval, receipt, POS record, reporting, and settlement are verified |
How to Set Up a Credit Card Terminal Step by Step
The following process provides a safe framework for credit card machine setup. Your terminal may combine several steps automatically, or your processor may complete part of the configuration before shipping the device.
1. Verify Terminal Compatibility
Confirm the exact terminal model is supported by your payment processor, merchant account configuration, gateway where applicable, and POS system if the terminal will be integrated.
Also confirm that the intended configuration supports the payment methods your business needs, such as EMV payments, contactless payments, credit, PIN debit, or mobile wallets.
Do this before connecting an independently sourced terminal. A used or previously deployed device may be physically functional but provisioned for another environment or no longer supported.
2. Inspect the Terminal Before Installation
Check the box and device before connecting anything.
Look for:
- Shipping damage
- Missing accessories
- Incorrect cables
- A damaged keypad or touchscreen
- Loose casing
- Broken security seals where applicable
- Unfamiliar attachments
- Altered card slots
- Damaged printer components
- A power adapter that does not match the approved equipment
If something looks suspicious or substantially different from expected equipment, stop the installation and contact the authorized provider.
PCI Security Standards Council guidance encourages merchants to inspect payment devices for tampering and unauthorized substitution.
3. Connect the Terminal to Power
Place the terminal on a stable surface where customers can comfortably insert cards, tap devices, and enter a PIN without exposing the keypad unnecessarily.
Connect only the approved power supply supplied or specifically authorized for the terminal. Avoid substituting an adapter simply because the connector fits. Voltage, amperage, polarity, and device requirements can differ.
Protect the cord from foot traffic, liquids, sharp bends, doors, and other equipment that could damage it.
After connecting power, allow the device to complete its normal startup sequence.
4. Connect the Terminal to the Internet
Most current payment terminals communicate through Ethernet, Wi-Fi, or cellular networks.
For an Ethernet payment terminal, connect the approved network cable to the correct terminal or docking-port interface and an active network connection. In many environments, network addresses are assigned automatically.
For payment terminal Wi-Fi setup, select only the merchant’s authorized secured wireless network and enter the credentials according to the terminal’s approved instructions. Avoid public or open Wi-Fi for payment processing.
A cellular payment terminal may use an installed SIM or eSIM and a service plan managed by the device or payment provider. Check signal status before attempting activation.
Do not change DHCP, static-IP, DNS, firewall, proxy, or other advanced network settings unless instructed by an authorized provider or your qualified network administrator.
5. Activate the Terminal
Payment terminal activation links the physical device to the appropriate processing environment.
Depending on the provider, activation may involve:
- Device registration
- Merchant-account assignment
- Secure software download
- A processor configuration package
- Remote provisioning
- Terminal authentication
- POS registration
- Location assignment
Some terminals arrive substantially preconfigured and activate after connecting to the network. Others require an authorized activation workflow.
Follow the terminal provider’s instructions exactly. Never guess an administrator password, activation code, or hidden menu procedure found on an unverified source.
6. Verify the Merchant ID and Terminal ID
A Merchant ID (MID) generally identifies the merchant processing relationship or account within a payment environment. A Terminal ID (TID) generally identifies a particular terminal or logical terminal instance.
They are related, but they are not interchangeable.
A multi-location company might use different merchant, location, or terminal identifiers depending on its processing structure. Several terminals can sometimes operate under one merchant relationship while retaining distinct TIDs for transaction routing and reporting.
The exact format and hierarchy are processor-specific. If the terminal displays incorrect business information or an unexpected identifier, do not edit account values based on guesswork. Contact authorized support.
7. Initialize or Download the Terminal Configuration
Terminal initialization allows the device to retrieve or apply the configuration necessary to communicate with the payment processor.
This may include information such as supported applications, transaction types, processor routing, receipt parameters, network settings, EMV configuration, contactless settings, and other approved values.
Many terminals receive these settings automatically after authentication.
Do not interrupt a legitimate configuration download unless the device or provider instructs you to do so. If initialization repeatedly fails, verify network connectivity and contact the processor rather than experimenting with undocumented configuration menus.
8. Configure Supported Payment Methods
Next, confirm the payment types that the business is authorized to accept.
Common possibilities include:
- EMV chip
- NFC/contactless cards
- Mobile wallets
- Credit transactions
- Debit card processing
- PIN debit
- Magnetic stripe when supported and appropriate
- Manually entered transactions when separately authorized
Do not assume every feature shown on the terminal is enabled for your merchant account.
For chip payments, the customer typically inserts the chip end of the card into the reader and leaves it in place until the terminal indicates that the transaction is complete.
For contactless payments, customers present a compatible card, phone, watch, or other supported device near the terminal’s contactless area. Visa similarly describes contactless transactions as payments made by tapping a compatible card or payment-enabled device at a contactless-enabled terminal.
9. Configure Receipt Settings
Terminals may support printed receipts, electronic receipts, or both.
Review settings such as:
- Customer receipt
- Merchant receipt
- Number of printed copies
- Business name
- Location information
- Receipt footer
- Digital receipt options
- Tip line when applicable
Verify printed merchant information against the processor or POS records. Do not place unnecessary sensitive payment data on receipts.
If the terminal has an integrated receipt printer, install the correct paper type according to the manufacturer instructions.
10. Configure Tips Where Applicable
Restaurants, salons, hospitality businesses, personal-service companies, and other tip-based businesses may need additional settings.
Depending on the system, the customer may be shown suggested percentages, a custom-tip option, or another tipping interface.
Some restaurant environments authorize an initial amount and add the final gratuity through an approved tip-adjustment process before capture or settlement. Other systems collect the tip before the transaction is authorized.
Because tipping workflows affect authorization, capture, reconciliation, and settlement, use the workflow supported by your processor and POS platform rather than attempting to redesign it through terminal settings.
11. Configure Tax and POS Settings
Taxes, product prices, discounts, inventory, and order calculations are frequently managed by the POS or register rather than by the payment terminal itself.
In an integrated environment, the POS calculates the amount due and sends the final payment amount to the terminal.
A standalone terminal may simply receive an amount manually entered by an employee.
Determine which system is responsible for calculating sales totals before training employees. Having tax configured in both the POS and payment device can create incorrect totals in certain architectures.
12. Verify the Date and Time
Check that the displayed date, time, and time zone are correct.
Accurate time records can help with:
- Transaction logs
- Shift reports
- Receipt records
- Batch settlement
- Reconciliation
- Troubleshooting
- Support investigations
Some terminals obtain time automatically from the processing or network environment. If the displayed time is wrong and no approved user setting is available, contact support rather than forcing an undocumented change.
13. Run a Credit Card Terminal Test Transaction
Use a small legitimate purchase to test the entire transaction path.
A practical test procedure is:
- Ring up or enter a small authorized purchase.
- Present a supported payment method.
- Wait for an approved response.
- Confirm that the receipt contains the expected merchant information.
- Verify that an integrated POS recorded the sale correctly.
- Confirm that the transaction appears in processor reporting.
- Void or refund the transaction using your normal approved procedure if appropriate.
Do not repeatedly run unnecessary live transactions simply to experiment with the terminal.
14. Test EMV Chip Payments
Run at least one appropriate chip transaction if EMV acceptance is part of your configuration.
Insert the chip card correctly and keep it in the reader until the device says it can be removed. Confirm that the transaction reaches an approval or other expected outcome.
Do not intentionally force a chip failure simply to test magnetic-stripe fallback. Fallback processing is governed by terminal capabilities, processor configuration, and card-network rules.
15. Test Contactless Payments
If the device is a contactless payment terminal, test an approved NFC payment.
You can use an appropriate contactless card or supported digital wallet. Present it near the designated contactless area and wait for the terminal’s indicator, tone, screen message, or other confirmation.
If chip payments work but contactless does not, the NFC function may be disabled, improperly configured, unsupported for that merchant profile, or affected by a terminal issue.
16. Test PIN Debit Where Applicable
PIN-debit availability depends on the merchant account, processor, debit network arrangements, terminal capability, and configuration.
If enabled, test the normal customer flow and confirm that the PIN pad responds correctly.
Never ask employees to record customer PINs or watch customers enter them. Position the terminal so customers can reasonably shield PIN entry.
If debit options that should be available are missing, contact the processor rather than attempting unauthorized application changes.
17. Verify Batch Settlement
An approval does not by itself prove that the complete payment cycle is working.
Confirm how the terminal handles the batch containing captured sales. A system may close automatically at a scheduled time or require an authorized employee to initiate settlement.
Verify that the test transaction moves through the processor’s reporting and reconciliation workflow as expected. Understand the settlement cutoff and expected funding process for your account.
For additional context on reviewing batch activity, deposits, and processing details, see this guide to reading a merchant processing statement.
How Credit Card Terminals Communicate With Payment Processors
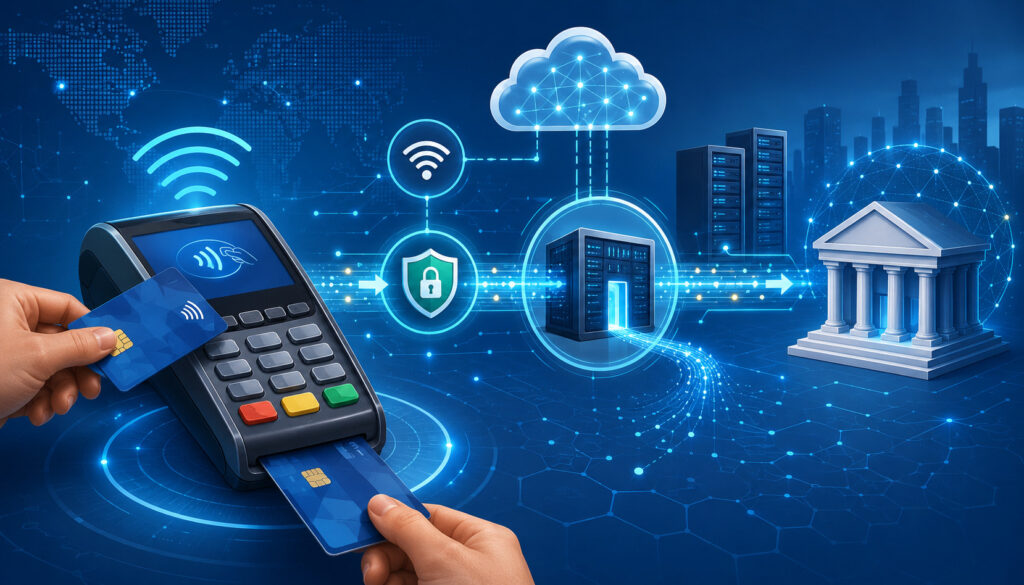
A card transaction may appear to happen entirely inside the terminal, but several systems participate behind the scenes.
A simplified payment authorization flow works like this:
- The customer presents the card or device. The terminal reads the payment credentials through the appropriate interface.
- The terminal prepares the transaction request. Required transaction information is captured and protected according to the payment environment.
- The authorization request is transmitted. The terminal communicates with the processor or connected payment platform.
- The acquiring side routes the request. The processor/acquirer sends the transaction through the appropriate card network.
- The card network routes it to the issuer. The issuing bank evaluates the authorization request.
- The issuer approves or declines it. The decision depends on account status, available funds or credit, security checks, and other factors.
- The response returns to the terminal. The customer and merchant see the result.
- Approved transactions are captured and later settled. Depending on the setup, transactions are collected into a batch or submitted through another capture and settlement process.
This distinction helps explain why payment authorization and settlement are not the same event. An approved authorization indicates that the transaction was accepted at that stage; settlement is the later process that submits captured transactions through the payment system for funding.
Processor configuration also affects costs and reporting. Businesses trying to understand the financial side of these activities can review this overview of credit card processing fees.
Credit Card Terminal Connection Methods
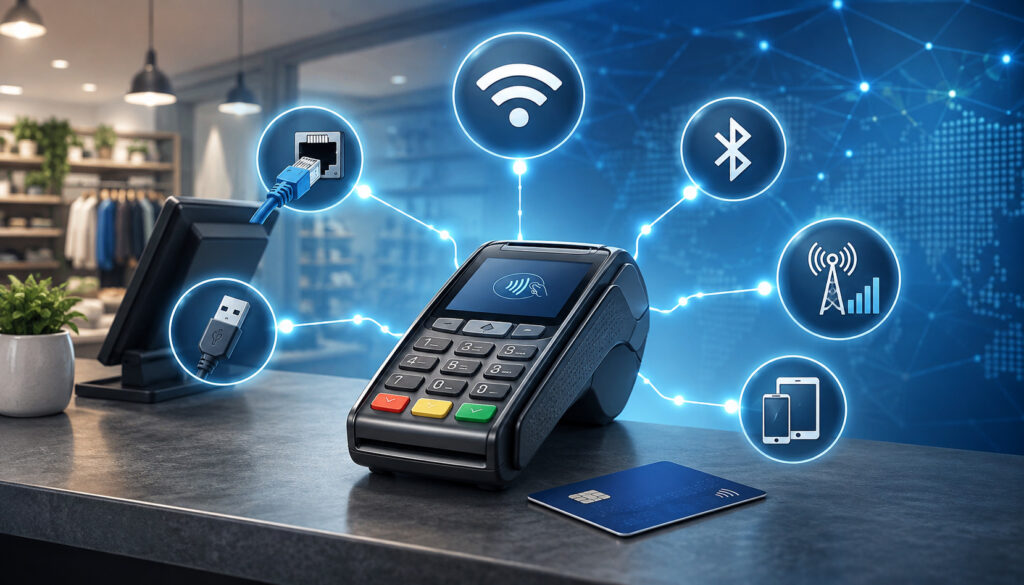
A stable credit card terminal connection is essential because authorization requests usually need to move between the merchant and payment processor quickly and securely.
The most common connections are Ethernet, Wi-Fi, and cellular. The best option depends on the terminal, physical environment, mobility requirements, network architecture, and provider support.
Ethernet Payment Terminal Setup
Ethernet is often well suited to permanent countertop locations because it provides a wired connection between the terminal or terminal base and the business network.
Use intact, properly terminated network cables and keep them away from places where they can be pulled, crushed, soaked, or repeatedly disconnected. Where possible, label payment-device network cables so employees do not accidentally move them during equipment changes.
Many business networks assign addresses automatically through DHCP. Static addresses or specialized network configurations may also be used, but merchants should change those settings only when authorized by the provider or network administrator.
If an Ethernet terminal has no connection, confirm that the cable is seated securely, the router or switch port is working, and other authorized network services are operating before changing terminal parameters.
Payment Terminal Wi-Fi Setup
Wi-Fi can simplify installation where running a network cable is inconvenient or where a wireless terminal needs to move within the premises.
Connect the terminal only to an authorized, secured network. Avoid open guest networks, public hotspots, or other connections that the business does not control.
Signal strength matters. A terminal positioned at the edge of wireless coverage may work intermittently even though it technically connects to the network.
Businesses should also protect the surrounding network infrastructure. The Federal Trade Commission’s Cybersecurity for Small Business guidance recommends measures that include protecting business networks and securing routers.
Where appropriate, businesses may separate payment systems from general-purpose or guest network activity using an architecture designed by qualified IT personnel. Any segmentation relied upon for security or compliance should be properly implemented and maintained.
Cellular Payment Terminal Setup
Cellular terminals communicate through supported mobile networks rather than relying entirely on the merchant’s wired or Wi-Fi infrastructure.
They can be useful for tableside service, mobile businesses, field technicians, outdoor events, delivery operations, temporary selling locations, and environments where a fixed network connection is unavailable.
A cellular terminal may use a physical SIM or eSIM, and the service arrangement may be supplied by the processor, equipment provider, or another authorized party.
Before relying on cellular connectivity, check signal quality throughout the places where the terminal will actually be used. A device that connects next to a window may lose service in a back room or outdoor booth.
Do not substitute SIM cards, change access-point configuration, or modify carrier settings unless your authorized provider specifically supports that procedure.
Setting Up Terminals for Different Business Environments
The basic installation sequence is similar across industries, but the operational details change depending on how customers pay.
Restaurants often need tipping, POS integration, table or order references, receipt controls, and carefully planned batch settlement. Tableside terminals may also need dependable wireless or cellular coverage across the dining room, patio, or other service area.
If tips are adjusted after an initial authorization, managers should understand exactly when transactions become final and when the batch closes. Employees need training so they do not miss tip adjustments or modify already settled transactions incorrectly.
Retail stores generally prioritize checkout speed, countertop placement, EMV chip acceptance, contactless payments, receipt printing, and integration with inventory or register systems. Place the terminal so customers can reach both the chip slot and NFC area without forcing employees to handle cards unnecessarily.
Cable management also matters. A card terminal pushed around a checkout counter every day can eventually experience damaged power, network, or peripheral connections.
Service businesses may choose either countertop or mobile credit card reader setup depending on where customers pay. A professional office may prefer a fixed terminal, while contractors, technicians, and mobile services may need wireless or cellular processing.
Some service environments also use invoices, deposits, recurring billing, or tipping. Confirm which activity happens in the terminal and which belongs in invoicing, accounting, or POS software.
For multiple locations, create a clear device inventory. Record which authorized terminal belongs to each site, along with its serial number, TID where used, location assignment, support information, and settlement relationship.
Do not assume every location should share exactly the same MID. Merchant-account structures vary, and processors may create separate identifiers for reporting, business entities, bank accounts, or locations.
Standalone Terminals, POS Integration, Receipts, and Settlement
A standalone terminal and an integrated POS terminal can both process in-person payments, but the surrounding workflow is different.
With standalone processing, the sale and payment records may live in separate systems. Staff must therefore reconcile the register or invoice amount with the terminal amount.
With integrated checkout, the POS usually sends the amount directly to the terminal and receives the transaction response. This can improve reconciliation and support inventory, reporting, restaurant ordering, and other operational features, although the installation is usually more complex.
To connect a terminal to a POS system:
- Confirm that the terminal hardware is supported.
- Confirm that the payment processor supports the POS integration.
- Install or enable only the approved POS payment integration.
- Follow authorized pairing or registration instructions.
- Confirm that the correct merchant location is assigned.
- Send a small test transaction from the POS.
- Verify that the amount reaches the terminal correctly.
- Confirm that the result returns to the POS and appears in reporting.
Never invent or reuse a pairing code from another merchant or terminal.
Loading Receipt Paper
Printer designs vary, but most built-in thermal receipt printers use a roll placed inside a hinged printer compartment.
Open the compartment according to the manufacturer instructions, remove any protective material, position the correct paper roll in the required direction, leave enough paper extending through the opening, and close the cover securely.
Print a test receipt. If the paper feeds but remains blank, the roll may be reversed or the wrong paper may be installed.
Avoid sharp tools around printer rollers or other internal terminal components.
Automatic and Manual Batch Settlement
A batch is a group of captured transactions submitted through the settlement process.
With automatic batch settlement, the system closes or submits the batch at a configured time. This can reduce the risk that staff forget an end-of-day procedure.
With manual settlement, an authorized employee initiates the batch close. This may provide additional operational control but creates a dependency on staff completing the process correctly.
Merchants should understand:
- Settlement time
- Processing cutoff
- Which transactions are included
- What happens to transactions entered after cutoff
- Tip-adjustment deadlines where relevant
- Expected funding timing
- Who is authorized to close a batch
Pro Tip: Do not change an automatic settlement time merely because another business uses a different schedule. Settlement settings can interact with processor cutoffs, tips, business hours, reporting, and funding.
Voids and Refunds
A void generally cancels an eligible transaction before it has completed the applicable settlement process. A refund generally returns money after a transaction has already been completed or settled.
The exact workflow and availability vary by terminal and processor.
When testing a terminal, use the normal approved void or refund function if you need to reverse the test purchase. Avoid repeatedly processing and refunding transactions as an equipment diagnostic method.
Permissions may restrict refunds to managers or authorized staff. Those controls should remain in place rather than being weakened for convenience.
Common Credit Card Terminal Setup Problems and Troubleshooting
Card terminal troubleshooting should begin with simple physical and account checks. Avoid changing hidden settings, loading unauthorized software, or experimenting with processor credentials.
- The terminal will not power on. Confirm that the approved power adapter is connected to both the terminal and a working outlet. Inspect the cable and connector for damage. If the terminal uses a battery or charging dock, confirm that it is correctly seated and has had sufficient charging time.
- No internet connection. For Ethernet, check the cable, router or switch port, and network equipment. For Wi-Fi, verify that the approved network is available and that signal strength is adequate. For cellular devices, check the normal signal indicator and service status.
- Terminal cannot connect to the processor. First confirm that general network connectivity works. If the device is online but processor communication repeatedly fails, an outage, account configuration problem, incorrect provisioning, or processor-side issue may be involved.
- Activation failed. Confirm that you are activating the correct terminal for the correct merchant or location. Restart the authorized activation workflow once if instructed. Persistent activation failures should be escalated to the terminal provider or processor.
- Incorrect Merchant ID or Terminal ID. Do not edit identifiers based on another terminal’s settings. A mismatched MID or TID can indicate an account-assignment or provisioning problem that processor support should correct.
- Chip reader not working. Inspect the card slot for visible obstruction or damage without inserting tools. Try an appropriate second chip card if available. If multiple functioning chip cards fail while other payment methods work, contact support.
- Contactless payments not working. Confirm that the terminal model supports NFC and that contactless acceptance is enabled for the merchant configuration. Try a different compatible contactless payment method before concluding that the reader is defective.
- PIN pad not responding. Check whether PIN debit is actually enabled for the account. If an external PIN pad is used, verify authorized cables and connections. Do not dismantle secure keypad hardware.
- Receipt printer not working. Confirm the correct paper is loaded in the correct direction and that the printer compartment closes properly. If the printer reports a hardware fault, follow the manufacturer or provider troubleshooting procedure.
- Transactions are declining. A decline does not automatically mean the terminal is defective. The issuer may decline a particular card, or the merchant account, transaction type, security control, processing limit, or configuration may need attention. Test with another legitimate payment method before escalating.
- Batch will not close. Confirm network connectivity and check whether unresolved transactions, tip adjustments, or processor conditions are preventing settlement. Do not delete transactions to force a batch close.
- Communication error. Check the connection type first. If local connectivity appears normal, the processing host or another service may be temporarily unavailable.
When the Terminal Says “No Connection”
A “no connection” or similar communication message usually means the terminal cannot reach the network or payment system it needs.
Check, in order:
- Power and normal device status
- Ethernet cable if used
- Wi-Fi connection and signal strength
- Router or network availability
- Cellular signal where applicable
- Whether other affected payment terminals are experiencing the same issue
- Known service or processor outages
- Authorized network configuration
If multiple terminals fail at the same time, the issue may be upstream rather than a hardware failure in every device.
“Invalid Merchant” and Similar Errors
An “invalid merchant,” inactive merchant, unregistered terminal, or similar message often requires processor assistance.
The merchant account may not be active for that transaction type, the device may be assigned incorrectly, or processor provisioning may be incomplete.
Do not try random MIDs, TIDs, credentials, or setup codes. Contact authorized processor support and provide the terminal’s documented device information along with the exact error message.
Payment Terminal Security, PCI DSS, and Ongoing Maintenance
Payment terminal security is part of daily payment operations, not simply a task completed during installation.
PCI DSS applies broadly to entities that store, process, or transmit cardholder data, or that can affect the security of that data.
Using a secure terminal can help reduce exposure, but possessing a compliant payment device does not automatically make the business’s entire payment environment PCI DSS compliant. PCI SSC specifically explains that payment-terminal configuration and the surrounding environment remain relevant to PCI DSS.
Businesses can use the PCI Security Standards Council merchant resources to understand responsibilities that may apply to their environments. The Council’s document library identifies PCI DSS v4.0.1 as the currently published revision of the standard.
Inspect Terminals for Tampering
Make physical inspection part of normal opening, closing, or periodic security procedures.
Look for:
- Loose or separated casing
- Broken or altered seals
- Unusual overlays
- Card slots that look different
- New attachments
- Unfamiliar cables
- Missing equipment
- Unexpected replacement devices
- Changed serial numbers or asset labels
PCI SSC guidance specifically recommends periodic inspection of payment devices for tampering and unauthorized substitution.
If something appears suspicious, stop using the device and contact the authorized terminal provider, merchant bank, processor, or security contact.
Keep Terminal Software Updated
Terminal firmware, payment applications, security components, and configuration files may require updates.
Accept updates only through authorized processes. Do not install third-party firmware, unofficial payment applications, or software obtained from unverified websites.
If the terminal announces an update at an unusual time or in an unfamiliar format, confirm the procedure with the provider before entering administrative credentials.
Protect Administrative Access
Terminal and processor administration accounts should be restricted to people who genuinely need them.
Avoid sharing one administrator credential across a large staff. Use unique accounts where the platform supports them, apply strong authentication practices, remove access when employees leave, and protect credentials from being displayed near the terminal.
Never disable security controls merely to speed up checkout.
EMV and Contactless Security
EMV chip transactions use chip-based technology rather than relying only on static magnetic-stripe information. Contactless EMV transactions also use chip-based transaction security.
EMVCo states that contactless chip transactions generate transaction-specific security information rather than simply transmitting reusable static card information in the same manner as traditional magnetic-stripe transactions.
These technologies improve the card-present security environment, but merchants still need secure networks, properly configured devices, access controls, fraud procedures, and PCI DSS practices.
Maintain the Terminal
Routine maintenance can prevent avoidable downtime.
Businesses should:
- Keep liquids away from terminals
- Clean devices according to manufacturer instructions
- Avoid spraying cleaner directly into slots or openings
- Inspect cables regularly
- Replace receipt paper before it is exhausted
- Keep charging equipment in good condition
- Review authorized update notices
- Maintain accurate equipment inventories
- Keep devices physically secured when the business is closed
Restarting a terminal on an arbitrary schedule is generally unnecessary. Follow device or provider guidance. Restarting can help resolve certain temporary problems, but repeated unexplained freezes should be investigated rather than normalized.
Know When to Replace a Terminal
Replacement may be appropriate when hardware is physically damaged, a chip reader consistently fails, the keypad is unreliable, required payment applications are no longer supported, security support is ending, or the terminal cannot support payment methods required by the business.
When replacing a terminal, coordinate the change with the processor. The new device may need a different TID or other provisioning, while the old device may need to be formally deactivated.
Securely decommission old equipment according to the provider’s instructions. If the equipment is rented or leased, follow the contractual return procedure rather than disposing of it independently.
Common Setup Mistakes to Avoid
Several problems can be prevented before the first customer transaction.
Avoid:
- Buying unsupported hardware
- Skipping processor activation
- Connecting payment devices to public Wi-Fi
- Confusing MID and TID values
- Ignoring batch settlement configuration
- Failing to test EMV and contactless payments
- Skipping POS-integration tests
- Ignoring software updates
- Changing advanced settings without authorization
- Using unapproved power adapters
- Placing terminals where cables are easily damaged
- Sharing administrator credentials carelessly
- Failing to inspect devices for tampering
- Assuming an authorization proves settlement works
After setup, train employees on normal sale, decline, receipt, void, refund, tip, and settlement procedures that apply to their roles.
Frequently Asked Questions
How do I set up a credit card terminal?
Verify that the terminal is approved for your payment processor and merchant account, inspect the equipment, connect power, establish Ethernet, Wi-Fi, or cellular connectivity, and complete the authorized activation process.
Verify the MID and TID where applicable, initialize the processor configuration, check payment and receipt settings, and run a small test transaction. Finally, confirm that the transaction appears correctly in your POS or processor reporting and enters the expected settlement workflow.
What do I need before installing a credit card machine?
You generally need an active merchant account or processing relationship, a compatible terminal, processor provisioning, an approved power supply, reliable connectivity, account or terminal identifiers where applicable, receipt paper if the device prints receipts, and authorized activation information.
Integrated terminals may also require supported POS software and payment-integration configuration. Confirm compatibility before purchasing equipment, especially when using a terminal obtained from somewhere other than your processor or POS provider.
How do I connect a credit card terminal to Wi-Fi?
Use the terminal’s authorized network setup procedure to select the business’s secured wireless network and enter the appropriate Wi-Fi credentials. Position the terminal where the signal is reliable, and avoid open or public networks.
Menu names vary by model, so follow the terminal provider’s documentation. Do not change advanced IP, DNS, security, or router settings unless instructed by authorized technical support or a qualified network administrator.
Can a credit card terminal use Ethernet?
Yes, many countertop payment terminals support Ethernet either directly or through a docking base. Connect an approved Ethernet cable to the appropriate terminal port and an active router or network switch connection.
Many environments assign network information automatically. If your network requires static addressing, VLAN configuration, firewall rules, or other specialized parameters, coordinate those settings with authorized processor support and your network administrator.
What is a Merchant ID?
A Merchant ID, commonly called an MID, is an identifier associated with a merchant’s processing relationship within a particular payment environment. It helps processing systems associate transactions with the correct merchant account or business configuration.
The exact structure varies by processor and acquiring arrangement. Businesses with several locations may have one or multiple MIDs depending on how their accounts are organized, so merchants should use only identifiers assigned by their authorized provider.
What is a Terminal ID?
A Terminal ID, or TID, identifies a particular terminal or logical terminal instance within a payment-processing environment. It can help distinguish activity by checkout station, device, or location.
A TID is not the same as an MID. Multiple terminals may operate under the same merchant relationship while retaining separate TIDs. Never copy a TID from another terminal unless your processor specifically instructs you to do so.
How do I activate a payment terminal?
Connect the approved terminal to power and its supported network, then follow the activation instructions from your processor, terminal provider, or POS provider. Activation may involve device registration, merchant assignment, remote software download, or configuration retrieval.
Some devices activate automatically once they authenticate with the provider. If an activation code or administrative credential is required, obtain it only through an authorized source.
How do I test a new credit card terminal?
Process one small legitimate purchase using a supported payment method. Confirm that the transaction is approved, the amount is correct, the receipt prints or delivers properly, and an integrated POS records the result.
Check the processor’s reporting system as well. Where appropriate, reverse the test using your normal authorized void or refund process. Later, confirm that the transaction followed the expected settlement workflow.
How do I enable contactless payments?
First confirm that the terminal hardware supports NFC and that contactless acceptance is included in your processor configuration. Many modern terminals receive the necessary contactless applications and settings during processor provisioning.
If tapping does not work after activation, contact your processor or terminal provider instead of trying undocumented menus. Contactless capability can depend on the hardware, payment applications, processor, merchant profile, and supported card networks.
Why is my credit card terminal not connecting?
Start with the connection method. Check Ethernet cables and network equipment, verify the secured Wi-Fi network and signal strength, or confirm cellular signal and service status.
If the terminal has internet connectivity but cannot reach the payment processor, there may be a processor outage, provisioning problem, firewall issue, account configuration problem, or device fault. Record the exact error message before contacting support.
Why are transactions declining after setup?
A decline does not always indicate faulty credit card machine setup. An issuing bank may legitimately decline the customer’s card.
However, repeated declines across different cards can point to incomplete merchant activation, unsupported transaction types, incorrect processor configuration, connectivity issues, account restrictions, or risk controls.
Do not repeatedly retry the same transaction without reason. If several legitimate cards fail, contact the processor with specific transaction times and error responses.
How do I close a batch on a card terminal?
The procedure depends on your processor and terminal. Some systems automatically submit batches at a scheduled time, while others require an authorized employee to initiate settlement. Follow the documented closing procedure for your equipment.
Before manually closing a restaurant batch, make sure required tip adjustments or other approved transaction changes are complete. If a batch repeatedly fails, contact processor support rather than deleting or manually altering transactions.
Can one merchant account use multiple terminals?
Often, yes. Multiple terminals may be assigned to one merchant processing relationship while using separate Terminal IDs or location identifiers.
Multi-location businesses may instead have several merchant accounts or MIDs depending on ownership, banking, reporting, settlement, processor, and operational structure.
Have the processor assign each device correctly rather than copying account information from one terminal to another.
When should a credit card terminal be replaced?
Consider replacement when the device is physically damaged, repeatedly unreliable, unable to read chip cards correctly, no longer receives required software or security support, or cannot support payment methods and integrations your business requires.
Replacement may also be necessary when changing processors or POS platforms if the existing equipment is incompatible. Coordinate replacement and deactivation with your authorized provider so account assignment, TIDs, settlement, and equipment return are handled correctly.
Conclusion
Learning how to set up a credit card terminal starts with verifying the payment environment rather than simply turning on the hardware. A business needs a compatible terminal, an active merchant account or processing arrangement, the correct processor configuration, approved power equipment, reliable connectivity, and authorized account information.
Installation normally involves connecting the terminal to Ethernet, secure Wi-Fi, or cellular service, completing payment terminal activation, verifying the merchant and terminal assignments, and allowing the device to initialize its approved configuration.
Once connected, confirm the payment methods your business needs. Test EMV chip transactions, contactless or NFC payments, and PIN debit where applicable. Review receipt, tip, POS, date, and time settings as well.
A successful test authorization is only part of the process. Businesses should also verify POS recording, processor reporting, batch settlement, and expected reconciliation so they know that transactions are moving through the complete payment workflow.
Security remains important after credit card terminal setup is finished. Protect administrative access, use secure networks, inspect payment devices regularly, apply authorized updates, follow PCI DSS responsibilities, and train employees to recognize unusual terminal conditions.
Most routine connection problems can be investigated safely by checking power, cables, network availability, wireless signal, receipt paper, and normal device status.
Processor-specific configuration errors, invalid merchant messages, repeated activation failures, unexplained payment-method problems, or account-assignment issues should be handled by authorized processor or terminal support.
The goal of a good payment terminal setup is not merely to produce one approved transaction. It is to create a payment environment that consistently authorizes transactions, records them correctly, settles them as intended, protects payment information, and gives employees a dependable process they can follow every day.